|
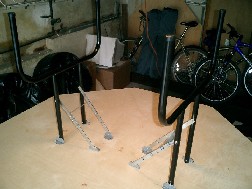
Flip
the table over and measure out where exactly to drill the legs on. I use the fold up legs as I don't want to keep the table
out all the time. These legs are extremely sturdy, come in black or chrome and are also height adjustable.
|
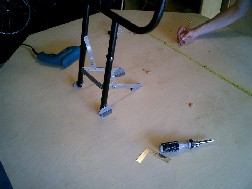
It
is always a good idea to completely lay out the legs to see where they will fold up BEFORE you drill both on (thanks Matt!).
Try to keep it more in the middle of the table so that the legs won't bother any of the players' own legs.
|
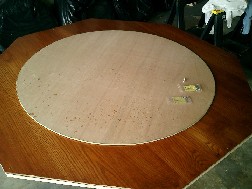
Next,
without scratching the table top, put the playing area wood circle on the EXACT middle of the stained table. Mark four points
in the circle (equal points around the circle) where you will drill holes to keep it on sturdy.
|
|
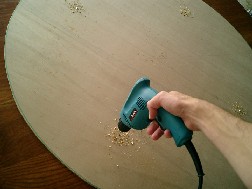
Drill
all the way through the table on theses marks. Have someone help you hold the wood so that the holes absolutely will line
up later on. Make sure the drill bit you use is the exact width of the 1.5" bolts you will be placing through. Do not use
anything too thick - gravity is on your side here. After drilling, take the top playing area wood off, put your bolts through
the self locking washers and through the four holes, and bolt them on the other side. We use self locking washers because
once the foam and felt is on, we will not be able to get to the top of the bolts for tightening - they will only be tightened
from the bottom of the table where the nuts are. I also tried to recess the bolt head into the wood as much as possible,
given that the wood is only 1/8" thick. Remember that the foam and felt will glued be ON TOP of the bolt heads.
|
|
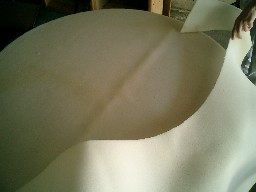
Cut
the foam so that it is the same size as the playing area circle. Now we are going to glue it on.
|
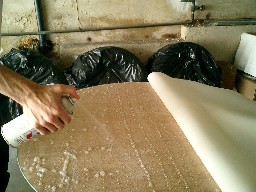
Using
spray adhesive, apply the glue to both the foam and the wood EVENLY. It is ok to be messy here, but try not to - this stuff
really sticks to everything. When laying the foam on top of the wood and glue, smooth it out evenly and as flat as possible.
|
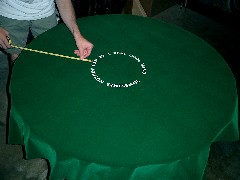
I
then took my felt and measured out exactly where the center of my writing would match the center of the wooden circle. Now
you do not have to get any writing on the felt, it was just a personal touch that I wanted to add - you don't see it too often.
If you do want it, find someone that can silkscreen - but don't go overboard. I did not put on pictures or heavy writing
as I didn't want the writing to interrupt the flow of the cards as they are dealt across the smooth felt. Also, I used velvetine
felt - it does not ball up, is easier to care for and lasts longer. I am not sure how silkscreening will affect other felts.
|