|
The
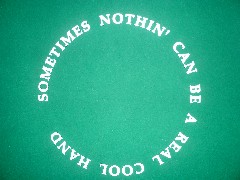
silkscreening came out prefectly. I chose Paul Newman's famous line from COOL HAND LUKE...it fit the players perfectly.
|
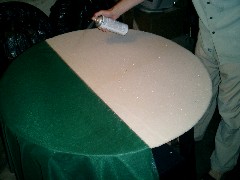
More
glueing - this time you must be more careful. Do not apply as much, be extremely even, and make sure when you smooth out
the felt on the foam, that you really do it well.
|
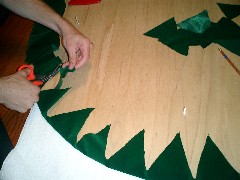
This
part is a bit of a pain in the ass, but i have not yet found a better way. Cutting these angles underneath the top where
it will hold down the foam properly really does a good job. After cutting, pull each one tight and glue them down with the
same adhesive.
|
|
I
have heard many complaints about the Perfect Padded Railing from casinosupply.com. Yes it is a pain to get on, but it can
be done correctly with patience and a helper. First, flip the table upside down and put the railing on the entire perimeter.
Then, from one point, begin stapling the bottom of the railing to the bottom of your table. But here is the trick - you
must look underneath the table (to the top of the table) to see how the railing is resting making sure it is flush. It is
not easy and is not a science, but it works for the most part.
|
Work
your way around the table stapling the railing tightly down. Cut the excess off and try to line up the seam as best as possible.
I covered the seam with a black PVC pipe that fit perfectly after i cut it. Some of you may wish to just leave the seam
exposed.
|
Flip
the table over when completed. The rail can be left like this, but as you will see later on, I chose to make it a bit more
sturdy.
|
|
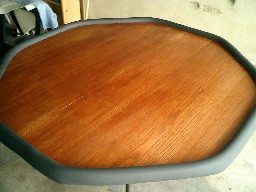
Take
the nuts off the bolts and place the playing area on the table - lining up all the bolts. Have at least two other people
helping you here as any unnecessary force can push the bolts right through or leave a bad mark in the foam and felt. After
the bolts are lined up and the top is on, tighten the nuts on the bottom of the table. Notice how you do not have to hold
the bolt heads due to the self locking washers. There should no real visible signs of the bolt heads in the felt.
|
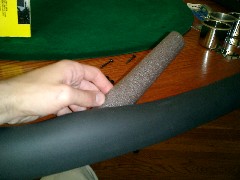
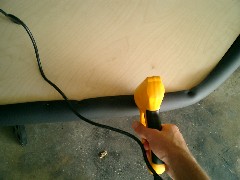
Getting
back to the rail. I inserted pieces of tube foam I bought from OSH or any hardware store inside the railing. I ended up
cutting it in half so that it did not affect how flush the rail was sitting on the top of the table.
|
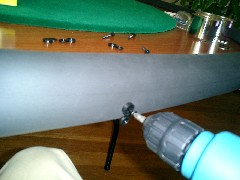
I
then used 5/8" wood screws, equally placed and lined up, to firmly hold the railing in place. Before drilling in, I put on
a black washer and cap that I think I found in the plumbing section. Once the screws are in place, the cap can be snapped
on hiding the screw heads.
|